

Blog, Hanging & Installation
Hanging Pictures Without Nails: No Damage Wall Decorating Guide
Do you want to decorate your spaces with art, but are worried about damaging walls with nails? No problem!
You can hang pictures and other artworks without nails or drilling holes by using magnetic solutions, adhesive strips, hooks, leaning displays, picture rails, washi tape, photo strings, or clips.
Whether you’re renting, redecorating often, or want to keep your walls clean, these clever methods create beautiful displays while protecting your walls. Read on for details and more tips.
Why Avoid Nails?
Nails create permanent holes in walls. This causes problems for many people:
- Renters cannot damage walls or lose security deposits
- Some people change decorations often and want flexibility
- Nails leave ugly holes that need patching
- Removal can damage paint and create repair work
- Heavy hammering can crack walls or disturb neighbors
- Wrong placement means starting over with new holes
Modern alternatives offer the same results without these issues. You can hang art safely and remove it cleanly later.
Method 1: Adhesive Strips and Hooks
Command Strips and Hooks
Command strips are the most popular choice for hanging art. They stick to walls with strong adhesive. When removed correctly, they come off cleanly without damage.
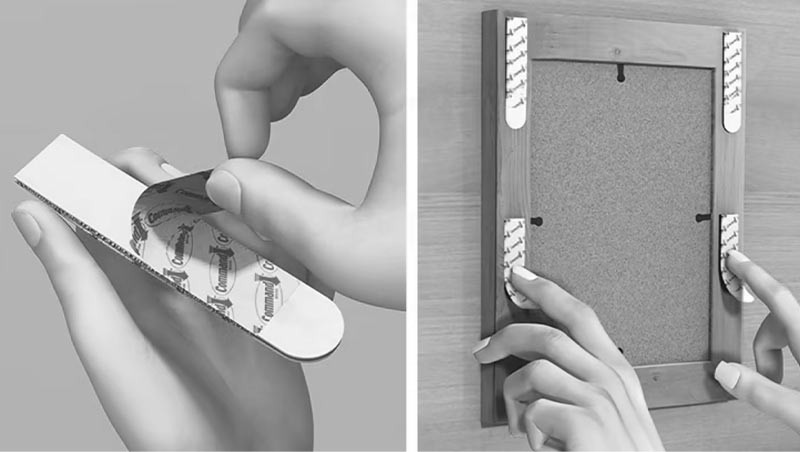
Types Available:
- Picture hanging strips for frames and artwork
- Utility hooks for various hanging needs
- Heavy-duty options for bigger and heavier pieces
- Water-resistant versions for bathrooms and kitchens
- Designer hooks that match your decor
Weight Limits by Product:
- Small strips: 2 pounds (suitable for photos and small prints)
- Medium strips: 4 pounds (handles most standard frames)
- Large strips: 15 pounds (supports bigger artwork)
- Heavy-duty strips: 20 pounds (for substantial pieces)
- XL hooks: 15 pounds (ideal for mirrors and heavy frames)
| Product Type | Max Weight | Max Size | Good For |
| Small Strips | 2 lbs (900g) | 12×17 cm | Small frames |
| Large Strips | 15 lbs (6.8kg) | 24×36 in | Big frames |
| XL Strips | 20 lbs (9kg) | 24×36 in | Heavy frames |
| Micro Hooks | 0.5 lbs (225g) | — | Light items |
| Medium Hooks | 2.9 lbs (1.3kg) | — | Bags, mirrors |
| XL Wall Hooks | 15 lbs (6.8kg) | — | Backpacks, mirrors |
Best Surfaces for Success:
- Painted walls (most common and reliable)
- Tile surfaces in bathrooms and kitchens
- Glass windows and mirrors
- Finished wood like painted cabinets
- Laminate surfaces and furniture
- Painted concrete and cinder blocks
Avoid These Problem Surfaces:
- Brick walls (too rough for good adhesion)
- Rough textures like stucco
- Wallpaper (can tear when removed)
- Unfinished wood (too porous)
- Popcorn ceilings (bumpy texture prevents bonding)
- Freshly painted walls (adhesive bonds to wet paint)
Step-by-Step Installation:
- Prepare the Surface: Clean the wall with rubbing alcohol. This removes oils and dirt that prevent good bonding. Let the area dry completely.
- Wait for Paint to Cure: New paint needs time to harden. Wait 1 week for oil-based paint. Wait 1 month for latex paint. This prevents the adhesive from bonding to uncured paint.
- Apply the Strip: Remove the backing paper. Press the strip firmly against the wall for 30 seconds. Use steady, even pressure across the entire strip.
- Attach to Art: Stick the matching strip to the back of your frame. Make sure it aligns properly with the wall strip.
- Mount the Art: Press your art against the wall strips firmly. You should hear or feel them snap together.
- Strengthen the Bond: Remove the art from the wall. Press the wall strips firmly for another 30 seconds. This creates a stronger bond.
- Final Mounting: Reattach your art by pressing the strips together until they snap securely.
Safe Removal Process:
- Grab the removal tab at the bottom of the strip
- Pull the tab straight down toward the floor slowly
- Keep pulling until the adhesive stretches and releases
- Use a hairdryer to warm stubborn adhesive
- Never pull tabs sideways or upward
- Work slowly to avoid paint damage
3M Claw System
The 3M Claw works for heavier art pieces that exceed strip limits. It uses hardened steel claws that grip inside drywall. This system provides serious holding power without hammering.
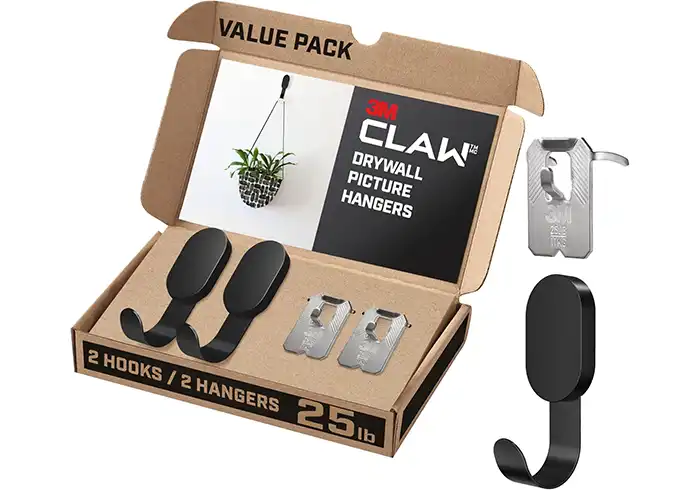
Weight Capacity Options:
| Size | Max Weight |
| Small to medium artwork | 15 lbs |
| Medium to larger pieces | 25 lbs |
| Large heavy frames | 45 lbs |
| XL- Very Heavy art | 65 lbs |
Installation Process:
- Mark your hanging spot on the wall
- Push the steel claws into the drywall by hand
- The claws spread inside the wall to grip
- Hang your art on the exposed hook
- Check that the piece hangs level and secure
Important Safety Rules:
- Two claws do not double the weight limit
- Use the single claw rating as your maximum weight
- Never exceed the package weight claim
- Check the installation periodically for safety
Best Applications:
- Heavy frames that exceed strip capacity
- Large mirrors in bathrooms and bedrooms
- Art pieces up to 3 inches thick
- Wallpapered surfaces where strips might fail
- Rental situations where some wall penetration is allowed
Method 2: Display Without Wall Hanging
Leaning Art Against Walls
Leaning art creates a casual, gallery-style look. This method works exceptionally well for large pieces, providing complete flexibility.
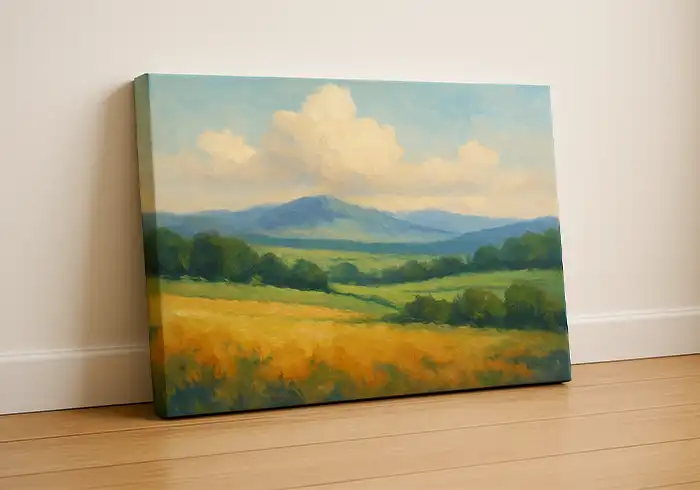
Choosing the Right Size:
- Use large pieces for floor displays (24 inches or bigger)
- Small pieces get lost when leaning on the floor
- Medium pieces work well on furniture surfaces
- Consider your room size when selecting art dimensions
Creating Intentional Displays:
- Add plants or books nearby to anchor the piece
- Use decorative objects to create visual weight
- Layer multiple pieces for depth and interest
- Match the art size to your furniture scale
- Align the top edge with windows or other features
Furniture Integration:
- Console tables provide perfect leaning surfaces
- Fireplace mantels create natural focal points
- Bookshelves offer built-in display areas
- Window sills work for smaller pieces
- Bathroom vanities can hold appropriate artwork
Safety and Stability:
- Add non-slip pads behind frames to prevent sliding
- Use small wall tacks for extra security
- Keep displays away from high-traffic areas
- Consider earthquake safety in prone areas
- Check stability regularly, especially with children or pets
Styling Tips:
- Group odd numbers of pieces for visual appeal
- Vary heights and sizes for dynamic looks
- Leave breathing room between pieces
- Use consistent frames for a cohesive appearance
- Change displays seasonally for fresh looks
Using Shelves and Furniture
Turn existing furniture into flexible art galleries. This approach integrates art into your overall decor scheme.
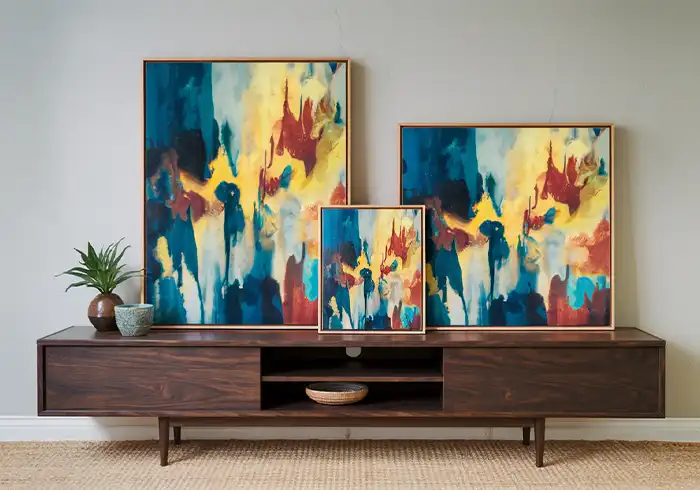
Floating Shelf Displays:
- Install shelves once, then change art freely
- Use LED strip lighting underneath for drama
- Layer items at different heights for visual interest
- Mix art with decorative objects and plants
- Choose shelf depth based on your art size
Bookshelf Integration:
- Clear spaces between books for small frames
- Use bookends to create display areas
- Vary the placement to avoid rigid patterns
- Consider the color of book spines when arranging
- Group books by color to create better backdrops
Mantel Arrangements:
- Center one large piece for classic symmetry
- Create asymmetrical groupings for modern looks
- Use seasonal themes to refresh the display
- Add candles or plants for layered interest
- Consider the fireplace opening size for proportion
Window Sill Opportunities:
- Deep sills work well for small art pieces
- Use natural light to enhance the display
- Choose weather-resistant pieces for humid areas
- Consider privacy needs when selecting art
- Rotate pieces with the seasons
Console Table Styling:
- Use the table surface for leaning larger pieces
- Add table lamps for ambient lighting
- Include storage baskets for a lived-in look
- Layer smaller pieces in front of larger ones
- Keep the display balanced but not perfectly symmetrical
Easels and Picture Rails
Easel Displays: Easels bring gallery sophistication to home spaces. They make art the primary focus and allow easy rotation.
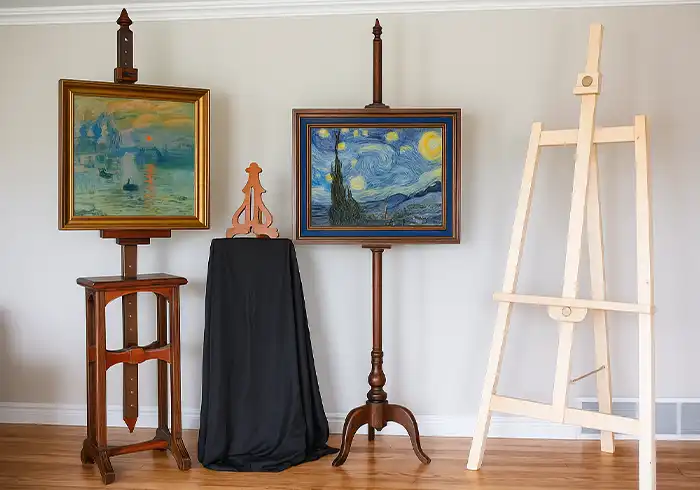
Types of Easels:
- H-frame easels offer maximum stability for large works
- A-frame easels provide classic appeal and save space
- Convertible easels adjust for different art sizes
- Tabletop easels work for smaller pieces and tight spaces
- Display easels focus on presentation over functionality
Placement Considerations:
- Choose rooms with enough space for proper viewing
- Ensure adequate lighting for optimal display
- Keep easels away from direct sunlight to protect the art
- Consider the traffic flow around the easel
- Use easels as room dividers in open floor plans
Picture Rail Systems: Picture rails use existing wall molding to hang art. This traditional method works exceptionally well in older homes.
Installation Process:
- Locate the picture rail molding near the ceiling
- Choose special hooks designed for rail systems
- Attach decorative rope or wire to the hooks
- Hang your art from the suspended line
- Adjust height and position as needed
Advantages:
- No wall damage below the rail
- Easy to move and rearrange art
- Works with various frame sizes
- Maintains consistent hanging height
- Adds authentic period charm to historic homes
Method 3: Magnetic Solutions
Magnetic Paint Systems
Magnetic paint transforms regular walls into interactive surfaces. The paint contains tiny metal particles that attract magnets.
Planning Your Magnetic Wall:
- Choose a wall section that gets regular use
- Consider the size of the art you want to display
- Plan for adequate lighting in the area
- Think about how often you will change displays
- Measure the space carefully before starting
Surface Preparation:
- Clean the wall thoroughly with degreasing cleaner
- Fill any holes or cracks with spackling compound
- Sand rough spots smooth for even coverage
- Prime the wall with high-quality primer
- Use painter’s tape to mark the magnetic area boundaries
Application Process:
- Stir the magnetic paint thoroughly before use
- Apply the first coat with a high-quality roller
- Let each coat dry completely (usually 4-6 hours)
- Apply at least three coats for good magnetic strength
- Add more coats for a stronger magnetic pull
- Remove the tape while the final coat is slightly wet
Finishing Options:
- Apply regular paint over magnetic paint for color
- Use chalkboard paint for dual functionality
- Add decorative finishes like metallics
- Consider dry-erase paint for interactive surfaces
Best Magnets for Magnetic Paint:
- Sheet magnets distribute weight evenly and stick well
- Rare earth magnets provide exceptional strength
- Disc magnets work for sandwiching lightweight art
- Decorative magnets add visual appeal to displays
- Magnetic strips can hold multiple pieces
Magnetic Strips and Tape
Self-adhesive magnetic strips provide targeted magnetic surfaces. They stick to walls and hold lightweight art pieces.
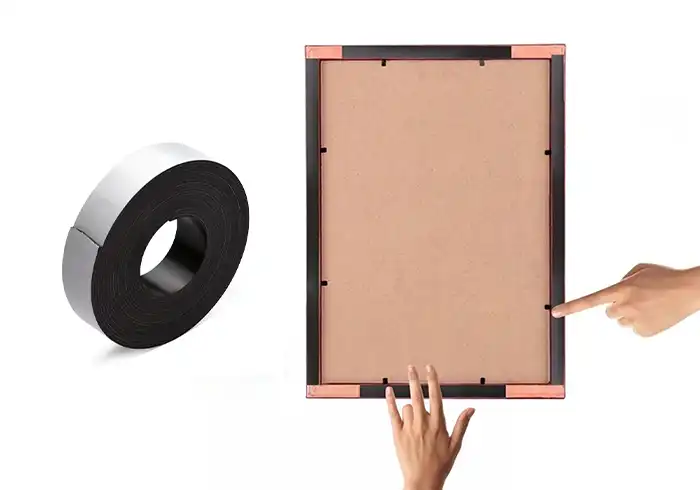
Types Available:
- Flexible magnetic tape that cuts to size
- Rigid magnetic strips for heavier items
- Decorative magnetic strips that blend with decor
- Extra-strong versions for challenging applications
- Removable options for temporary displays
Installation Methods:
- Direct Application: Stick magnetic strips directly to walls
- Sandwiching: Place art between two magnets
- Screw Attraction: Use magnets with existing screws or nails
- Ledge Support: Combine magnets with physical shelves
Creative Applications:
- Create changing photo displays in hallways
- Make interactive art walls for children
- Display greeting cards and invitations
- Show off small artwork collections
- Organize craft supplies and tools
Removal Considerations:
- Test removal in a hidden area first
- Use heat to soften stubborn adhesive
- Work slowly to avoid paint damage
- Some products may leave residue
- Strong magnets may damage walls when removed
Method 4: Lightweight Display Options
Washi Tape Applications
Washi tape is decorative tape with gentle adhesive. It works perfectly for very light items and temporary displays.
Creative Uses:
- Fake Frames: Create colorful borders around photos
- Gallery Grids: Design custom layouts directly on walls
- Seasonal Displays: Change decorations with holidays
- Kids’ Art: Rotate children’s artwork safely
- Inspiration Boards: Create mood boards and vision boards
Application Techniques:
- Clean the wall surface lightly
- Plan your design before applying tape
- Use a ruler for straight lines
- Press tape edges firmly for good adhesion
- Trim corners neatly with scissors
- Remove air bubbles for smooth application
Choosing the Right Tape:
- Pick colors that complement your decor
- Use wider tape for bold statements
- Choose patterned tape for visual interest
- Consider metallic options for an elegant look
- Buy quality tape for better adhesion
Removal Tips:
- Remove tape slowly at a 45-degree angle
- Use fingernails or plastic scrapers
- Clean any residue with mild soap
- Test removal before major applications
- Replace the tape periodically for best results
Photo Strings and Clips
String displays work wonderfully for collections of photos, cards, or lightweight artwork. They create dynamic, changeable galleries.
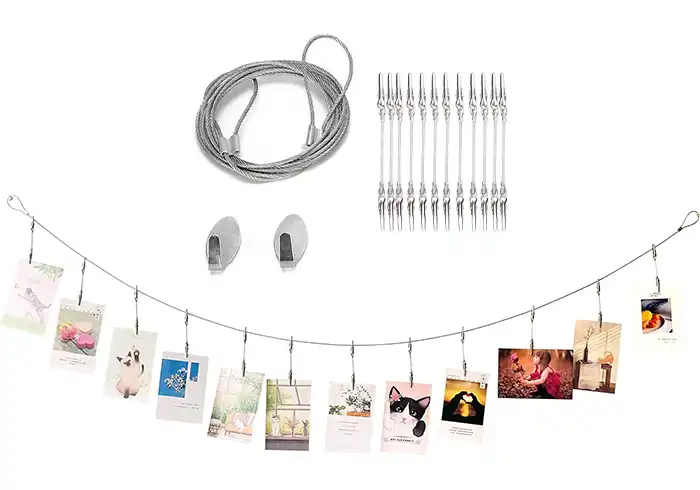
System Types:
- Simple String: Basic rope or twine with clips
- LED String Lights: Illuminated displays with clips
- Macrame Hangings: Bohemian-style woven displays
- Wire Systems: Industrial look with metal cables
- Ribbon Displays: Decorative fabric strips
Installation Process:
- Choose anchor points on opposite walls
- Install small hooks or use existing fixtures
- String your line at the desired height
- Ensure the line is taut but not overstretched
- Attach clips at regular intervals
- Load with your photos or artwork
Creative Arrangement Ideas:
- Create timeline displays of family photos
- Show seasonal artwork that changes monthly
- Display greeting cards and invitations
- Organize inspiration images for projects
- Feature children’s artwork with easy rotation
Maintenance and Updates:
- Check string tension regularly
- Replace worn clips as needed
- Rotate content to keep displays fresh
- Clean clips occasionally for a better grip
- Adjust the lighting to highlight key pieces
Success Tips and Best Practices
Pre-Installation Preparation
Wall Assessment:
- Check the wall condition thoroughly before starting
- Look for cracks, peeling paint, or moisture issues
- Test surface smoothness with your hand
- Identify wall material (drywall, plaster, concrete)
- Note any previous damage or repairs
Surface Cleaning Protocol:
- Remove all dust with a microfiber cloth
- Clean with isopropyl rubbing alcohol (70% or higher)
- Let the surface dry completely
- Avoid household cleaners that leave residue
- Repeat cleaning for heavily soiled areas
Paint Curing Guidelines:
- Oil-based paint: Wait one complete week minimum
- Latex paint: Wait 30 days for complete cure
- Primer: Follow the manufacturer’s recommendations
- Touch-up paint: Treat as completely new paint
- Test adhesion in hidden areas first
Weight and Size Calculations
Accurate Weighing:
- Use a kitchen scale for precise measurements
- Weigh the complete piece, including the frame
- Add a 10% safety margin to your calculations
- Consider the weight distribution across attachment points
- Account for any glass or heavy backing materials
Size Considerations:
- Measure the height, width, and depth of the artwork
- Check the maximum dimensions for your chosen method
- Consider how size affects visual impact
- Plan for proper spacing in grouped displays
- Account for frame thickness in your calculations
Further Reading:
- Ultimate Wall Art Sizing Guide: Calculator, Charts in (CM/Inches)
- How High to Hang Pictures & Paintings? The Correct Height Formula
- How Far Apart Should You Hang Pictures? Wall Art Spacing Guide for Any Layout
- Complete Guide to Hanging Art from Ceiling: Transform Your Space with Suspended Artwork
Environmental Factors
Temperature Management:
- Most adhesives work best between 50-105°F
- Avoid installation during extreme temperature changes
- Let products acclimate to room temperature
- Consider seasonal temperature variations
- Use space heaters or fans to maintain ideal conditions
Humidity Control:
- Standard products work in 30-70% humidity
- Use water-resistant versions in bathrooms
- Install exhaust fans to reduce moisture
- Avoid installation during rainy seasons
- Consider dehumidifiers for problem areas
Ventilation Requirements:
- Ensure adequate air circulation during installation
- Open windows when using magnetic paint
- Use fans to speed drying times
- Avoid enclosed spaces for adhesive applications
- Consider respiratory protection for sensitive individuals
Advanced Techniques and Troubleshooting
Combination Methods
Layered Security:
- Use multiple attachment methods for valuable pieces
- Combine adhesive strips with safety cables
- Add bottom ledges for extra support
- Use redundant systems for critical applications
- Plan backup methods for high-value art
Professional-Grade Solutions:
- Museum-quality hanging systems for valuable art
- Conservation-grade adhesives for archival pieces
- Climate-controlled display cases for sensitive items
- Professional installation for complex arrangements
- Insurance considerations for valuable collections
Problem-Solving Guide
Adhesion Failures:
- Check surface cleanliness and preparation
- Verify that weight limits were not exceeded
- Examine environmental conditions during installation
- Look for surface compatibility issues
- Consider product age and storage conditions
Removal Difficulties:
- Use a heat gun or a hair dryer to soften the adhesive
- Try dental floss to cut through adhesive bonds
- Use commercial adhesive removers carefully
- Work slowly to minimize paint damage
- Consider professional restoration for valuable walls
Stability Issues:
- Add additional support points
- Use a wider distribution of weight
- Check for vibration sources nearby
- Ensure that the proper installation technique was followed
- Consider upgrading to stronger hanging methods
Choosing the Right Method for Your Needs
For Heavy Art (10+ pounds)
- 3M Claw system provides maximum strength
- Multiple Command strips distributed properly
- Leaning displays with furniture support
- Professional hanging systems for valuable pieces
- Combination methods for extra security
For Medium Art (2-10 pounds)
- Command picture hanging strips work well
- Command utility hooks for various shapes
- Easel displays for standalone pieces
- Magnetic systems with strong magnets
- Furniture-based displays with good support
For Light Art (Under 2 pounds)
- Washi tape for temporary displays
- Magnetic strips and tape
- Photo strings with clips
- Simple leaning on shelves
- Adhesive hooks for small pieces
For Rental Properties
- Command products remove cleanly
- Leaning displays cause no damage
- Furniture-based displays are completely reversible
- Magnetic solutions work well
- Temporary methods that can move with you
For Frequent Decorators
- Magnetic paint systems allow easy changes
- Photo strings accommodate rotation
- Shelf displays enable quick updates
- Easels permit instant art swapping
- Removable adhesive methods
Maintenance and Long-Term Care
Regular Inspection Schedule
Monthly Checks:
- Examine all hanging hardware for wear
- Check adhesive bonds for loosening
- Look for any signs of wall damage
- Verify that weight limits are still appropriate
- Clean display areas as needed
Seasonal Maintenance:
- Rotate artwork to prevent fading
- Check for humidity damage in bathrooms
- Inspect adhesive performance after temperature changes
- Update displays with seasonal themes
- Replace worn clips and hardware
Annual Review:
- Assess overall display effectiveness
- Consider upgrades to better methods
- Plan for new artwork additions
- Review insurance coverage for valuable pieces
- Document your displays with photos
Troubleshooting Common Issues
Sliding or Shifting:
- Add non-slip pads behind frames
- Use additional attachment points
- Check for vibration sources
- Ensure proper weight distribution
- Consider upgrading the hanging method
Adhesive Failure:
- Review installation procedures
- Check environmental conditions
- Verify surface compatibility
- Consider product age and storage
- Upgrade to stronger alternatives
Wall Damage:
- Stop using the damaged area immediately
- Document damage with photos
- Consult professionals for valuable walls
- Use proper repair techniques
- Prevent future damage with better methods
Final Thoughts and Recommendations
Hanging art without nails opens up a world of creative possibilities. You can protect your walls while creating beautiful displays that change with your tastes and needs.
Start Simple: Begin with lightweight pieces and basic methods. Build your confidence and skills gradually. Learn what works best in your specific home environment.
Plan for Success: Take time to prepare appropriately. Clean surfaces, check weight limits, and follow instructions exactly. Good preparation prevents most problems.
Stay Safe: Never exceed weight limits or ignore safety guidelines. Your art and your walls are both valuable. Protect them with proper techniques.
Enjoy the Process: These methods offer you the freedom to experiment and make adjustments. Your displays can evolve with your tastes and collections. Have fun creating spaces that truly reflect your style.
With these techniques, you can create stunning art displays while keeping your walls perfect. Your home becomes a gallery that changes and grows with you.
Sources
- How to Use Command Strips to Hang Almost Anything – Apartment Therapy, accessed July 15, 2025, https://www.apartmenttherapy.com/how-to-use-command-strips-258206
- How to Choose Command™ Products | Weight Limit Guide | 3M Australia, accessed July 15, 2025, https://www.commandbrand.com.au/3M/en_AU/command-au/how-to-use/how-to-choose/
- How to apply and remove 3M Command Strips Picture Hanging Strips – YouTube, accessed July 15, 2025, https://www.youtube.com/watch?v=O1gNo2JqqWY&pp=0gcJCfwAo7VqN5tD
- Leaning Art Trend: How to Style Art Renter Friendly Without Hanging It – artmefree., accessed July 15, 2025, https://artmefree.com/leaning-art-renter-friendly-decorating/
- What To Consider When Buying An Easel Stand – KraftGeek, accessed July 15, 2025, https://kraftgeek.com/blogs/creator-inspiration/what-to-consider-when-buying-an-easel-stand
- 5 Breathtaking Floating Shelves That You Don’t Have to DIY – Clutter, accessed July 15, 2025, https://www.clutter.com/blog/posts/floating-shelves/
- Magically Magnetic Painting Guide, accessed July 15, 2025, https://www.lyt.com/magnetic-painting-guide/
- Hanging Art on a Wall with Magnets | K&J Magnetics Blog, accessed July 15, 2025, https://www.kjmagnetics.com/blog/hanging-art-with-magnets
- Four Fun Ways to Use Washi Tape – Parabo Press, accessed July 15, 2025, https://www.parabo.press/blog/how-to/four-fun-ways-to-use-washi-tape/
Want more wall art ideas, room styling tips and first access to new Bruzzen collections? Join the list — free.
Subscribe Free →